
Grissini Torinesi: The Crispy Soul of Piedmont in Your Kitchen
Authentic Grissini Torinesi — A refined expression of Piedmont’s culinary heritage.
Traditionally crafted with fine unbleached flour and active dry yeast, this Gustoli-exclusive version is optimized for effortless elegance for any meal.
Ready in 150 minutes, it seamlessly bridges authentic Italian tradition with modern nutritional excellence.
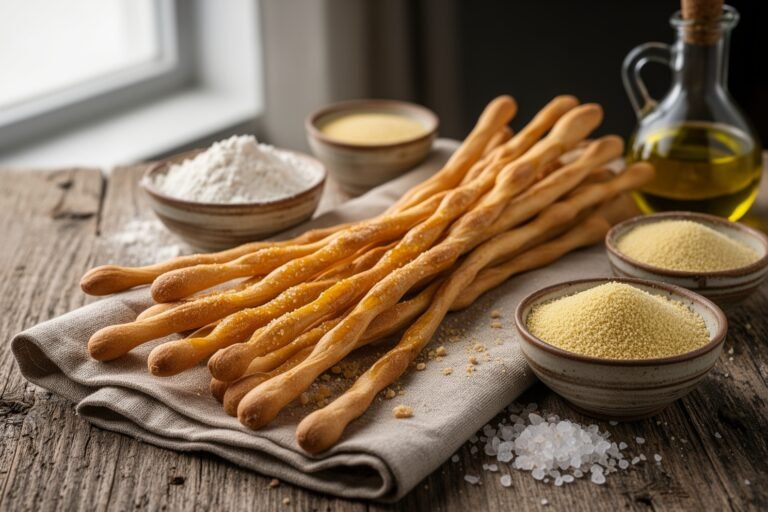
Beyond the Plate: The Story of Grissini Torinesi
Mastering the Technique
A step-by-step guide to Italian perfection
The Artisan’s Pantry
Selecting the right components is 70% of the Italian culinary success. Here is what I’ve curated for this Grissini Torinesi:
- 1 3/4 teaspoons finely granulated active dry yeast — Pro-Tip: Ensure your yeast is fresh and vibrant; activate it properly with warm water and a touch of sweetness.
- 1 tablespoon golden malt syrup (or organic honey) — Pro-Tip: This is essential for the signature crispness and subtle sweetness, contributing to a rich, golden crust.
- 1 1/4 cups pure, lukewarm spring water — Pro-Tip: Water temperature is crucial. Too hot will kill the yeast, while too cold will inhibit proper activation. Aim for around 105-115°F (40-46°C).
- 2 tablespoons first-press extra virgin olive oil from Puglia, plus more for brushing — Pro-Tip: Choose a high-quality, fragrant oil for a robust flavor foundation and a tender crumb in the finished grissini.
- 3 3/4 cups finely milled unbleached ’00’ flour — Pro-Tip: ’00’ flour provides a superior texture, resulting in grissini that are light and delicate. Always sift it to prevent lumps.
- 1 1/2 teaspoons flaky sea salt from Trapani — Pro-Tip: Distribute the salt evenly throughout the dough. It doesn’t just add salinity, but also enhances all the other nuanced flavors.
- 1/2 cup fine durum semolina flour — Pro-Tip: This ingredient is key for achieving the classic, satisfying crispiness and contributes to a beautiful golden color during baking.
- A whisper of finely grated lemon zest — Pro-Tip: This is my personal Gustoli tweak. Just a touch brightens the overall flavor profile, adding an unexpected, delicate aroma that perfectly complements the olive oil.
The Culinary Workflow
-
The Alchemist’s Start: Activating the Yeast
Start by combining the finely granulated active dry yeast with your golden malt syrup and a quarter cup of lukewarm water in a small bowl. Stir gently until everything dissolves completely and the mixture is uniform.
Watch for the magic: after about five to ten minutes, a foamy cap should form on the surface. This tells you your yeast is alive and ready to bring life to your grissini.
Alessia’s shortcut: I always use a clear glass bowl for this step. It lets me clearly see the yeast’s activity, ensuring it’s vibrant before I commit to the dough. If it doesn’t foam, discard and start again with fresh yeast.
-
Building the Foundation: The Dough Creation
In a large mixing bowl, or the bowl of your stand mixer, combine the finely milled ’00’ flour and the flaky sea salt. Pour in the activated yeast mixture, the remaining lukewarm water, and the first-press extra virgin olive oil. Mix with a sturdy spoon or the dough hook until a shaggy, cohesive dough forms.
Feel the change: The dough will start off sticky but gradually come together. Resist the urge to add more flour too quickly. It needs time to hydrate properly.
Alessia’s shortcut: After mixing, I let the dough rest for 10 minutes (autolyse). This allows the flour to fully absorb the liquid, making subsequent kneading much easier and developing gluten naturally, improving the final texture.
-
The Gentle Knead & Patient Rise
Turn the shaggy dough out onto a lightly floured surface. Knead it for 8-10 minutes until it becomes smooth, elastic, and no longer sticks to your hands. Incorporate the whisper of lemon zest during the last minute of kneading. Lightly grease a clean bowl with olive oil, place the dough inside, turn it to coat, and cover with a clean kitchen towel.
Listen to the silence: The dough needs quiet, warmth, and time to transform. It will double in size, indicating the yeast has done its work, filling it with tiny air pockets.
Alessia’s shortcut: For a more profound flavor development, I often place the covered dough in the refrigerator overnight for a slow cold proof. Just let it come to room temperature for an hour before the next step.
-
Sculpting and Perfecting: Shaping & Baking
Gently punch down the risen dough to release the air. Turn it onto a lightly floured surface dusted with the fine durum semolina flour. Roll the dough into a large rectangle, about 1/4 inch thick. Cut the dough into thin strips, around 1/4 to 1/2 inch wide, using a sharp knife or pizza cutter.
Feel the stretch: Take each strip and gently roll it between your palms, stretching it into a long, thin grissini, about 10-12 inches long. Aim for uniformity so they bake evenly.
Alessia’s shortcut: Arrange the shaped grissini on baking sheets lined with parchment paper, leaving a little space between each. Brush them lightly with extra virgin olive oil. Bake in a preheated oven at 375°F (190°C) for 15-20 minutes, or until they are deeply golden brown and crisp. Cool completely on a wire rack to ensure maximum crispness.
Alessia’s Expert Secrets
Achieving the perfect, unmistakable crunch of grissini relies on two things: rolling the dough thinly and baking in a sufficiently hot oven. The thin strips allow for quick dehydration, while the high heat ensures a rapid, crisp exterior before the interior can soften.
These exquisite grissini are incredibly versatile. They are superb alongside a selection of fine cured meats and cheeses, making them an ideal companion for antipasti. They also provide a delightful textural contrast when dipped into a rich olive oil or served with a rustic hearty minestrone.
Recipe Insights & Tips
Why is active dry yeast essential for this dish?
Active dry yeast is the engine of our grissini. It consumes the sugars in the flour and malt, producing carbon dioxide that creates those airy pockets. This leavening process gives the grissini their signature light, crisp texture. Without it, you’d simply have a flatbread, not a true grissini.
How does this fit into a Longevity diet?
This Grissini Torinesi recipe aligns beautifully with a Longevity diet. It uses minimal, high-quality ingredients like heart-healthy extra virgin olive oil and unbleached flours. Being naturally low in fat, low in sodium, and completely plant-based, it supports heart health and provides wholesome carbohydrates. It’s a testament to how simple, authentic Italian baking can be both delicious and incredibly nutritious.
Kcal
Wellness & Longevity Note
This Grissini Torinesi recipe, while a traditional delight, also offers considerable health benefits. The total calorie count of 2444 kcal refers to the entire recipe yielding 24 grissini, making each serving a sensible addition to your diet. The use of first-press extra virgin olive oil contributes beneficial monounsaturated fats, crucial for cardiovascular well-being. Coupled with the absence of dairy, eggs, and refined sugars, these grissini are wonderfully suitable for vegan and vegetarian lifestyles. Their low-sodium profile further enhances their appeal for those mindful of heart health. Enjoy the simple, wholesome goodness of these crispy breadsticks, a true Mediterranean staple.